Glitter on the Eyes -I like glitter and shiny things as much as the next girl, and I know everyone wants to be sparkly this time of year...but here is my general rule for using glitter make-up. Leave it to the lid and a touch under the eye only. I see everywhere that the newest trend is to use shimmer and glitter all the way up the crease of the eye almost to the brow. On most people this is going to make you look old and like a disco ball. It does nothing to define the eye or accentuate all the beautiful parts of the eye.
Glitter on the lid and just a thin smokey line under the eye is beautiful in any color that compliments your eye color.

* Blue eyes use plums or pinkish/pearl shimmer is really pretty
* Brown eyes I love golds and taupe colors even a really shimmery black (Cinderfella by MAC is a favorite)
* Green eyes look amazing in all plums and purples (don't do too much actual "purple" on the crease MAC Haux is a really nice matte color for the crease) Star Violet by MAC is beautiful on the lid and below the eye
Shimmer on the Lips -I only like shimmer lip gloss as a little extra touch on the middle of the bottom lip and the center of the upper lip. It also needs to go over a color of some kind or liner. Even if you want a "nude" lip you still need some lip stick to show up in pictures.

Blush and Body Shimmer -
I am a big fan of blush, but I only like a tiny bit of "sheen" on the apples of my cheeks. Like the favorite by Nars, "Orgasm"..it looks beautiful on almost everyone, but I only like it on the apples of my cheeks not all over. All over I like to use a matte blush or a cream blush on more mature skin. It is a softer finish and lasts a long time, especially with a little powder blush over the top.

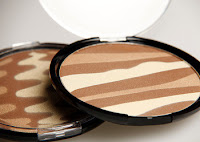
Body shimmer is fun for a night out too. My favorite is a body bronzer with a hint of gold shimmer in it (gold is much warmer on the skin then silver shimmer which can look very harsh in photos). Brush a little on the tops of the shoulders and along the color bone...dont cover your entire decollete or chest with it...looks funny in photos as you can often use too much and then your face looks really white.
Legs -
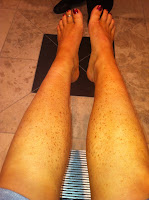
Brush some gold shimmer or light illuminating cream down the front of your shins and on the front of your thighs if you are wearing a really short skirt. It will grab the light in photos and your legs will look thinner and have a healthy glow to them.
Everything looks better with a litle color so, at the very least get a light airbrush tan so all your favorite colors will be enhanced and your new little shiny outfit will look that much better! Book now at My Flawless Tan. Where you can also find all your favorite make-up products for your night out. Remember the night only last a few hours, but those photos will be posted on Facebook forever:)


